Thursday, November 18, 2010

Facebook: How to Add a Contact Us Tab

So everyone has a "Contact Us" tab now and I wanted one too soooo I found out how to do it, successfully installed it, and now I want to share with you!

First you need to create a FBML page on your Facebook Fan Page.


2.  Click on "Add to My Page" under their profile picture.

3.  Choose which page you want to add it to.  Click "Add to Page", then close.  If you have multiple pages you won't think that anything happens but your page that you added it to will disappear from the list.  Becareful because I added it to my next page in line by accident.

4.  Now open up your fan page on Facebook and you should now see a tab called FBML 1.  Next you will need to create your contact us form using Jot Form and then we will come back to your FBML page to add the code and instructions will be below.


I found this tutorial but still had to figure a couple of things out so here is some clarification...

1.  Go to http://www.jotform.com/

2.  X out of the pop menu asking to start your new form.

3.  Scroll to the bottom of the page and click "Create an Account - It's Free"

4.  Once you create your account, click on "My Forms" on the top tool bar.

5.  Click on New Form
6.  In the new form wizard choose "Form Samples" and then from the drop down menu choose "Contact Us".

7.  The standard contact us form includes fields for first name, last name, email, message and submit.  At this point now you can edit your form and add additional elements such as drop down menus, radio buttons, etc.


8. Use the form style toolbar to change the font size, font color, background color, and other style changes.

9.  Your form is auto-saved but I would save it one more time.

10. Click on the Setup and Share tab


11. Choose Email Alerts to change the the email address where the submitted form will go to.  Just choose New email.  Here you can choose the email address to receive notifications and email address for an autoresponder email. 

12. Choose Notification if you want to change the subject of the email that is sent to you when someone completes the from and add additional fields.

13. Click "Reply to and Recipient Settings" to change the return address the is sent from.  It will default to a do-not-reply email address at Jotform.  I changed it to my email address so they can reply if they want.
14. You can also "Test Email" from here too.  I did test it to make sure it was coming across like I wanted.

15. You can choose what happens after someone submits your form.  It can go to a Thank You page (either one that you design or a default one from Jotform) or a URL you decide.  Just click the "Thank You" icon to set that.

15. After it is working, now you need to get the code.  Click "Share form" and choose "Advanced Options"


 16. Choose Social Networks from the menu on the left, then choose Facebook.  Click on the code, and press ctrl + a to select all, then ctrl + c to copy.

Now we are going to add this to your FBML application in Facebook!

1.  Go to your fan page on Facebook.

2.  Choose "Edit Page" below your profile picture.

3.  Click on "Applications" on the left menu.

4.  Scroll down until you see "FBML 1".  Choose "Go to Application".

5.  Click in the FBML box and press ctrl + v to paste your code.

6.  You change the wording on your tab in the "Box Title" field.  I just choose "Contact Us".

7.  Save changes and you are set!


Saturday, October 30, 2010

Mexican Enchillada Casserole

A friend of mine's Uncle was recently diagnosed with stage 4 cancer and has been commuting to Oklahoma City for Chemo treatments weekly leaving his poor wife at home with his 4 boys.  So I decided to bring them a couple of casserole meals that can be frozen or cooked that night depending upon their schedule. 

The first casserole meal is one of my favorites from growing up!  Mexican Enchillada Casserole!  Yummy!

1 lb. Ground Beef
1 pkg. of Taco Seasoning
1 can of Wolf Brand Chili or your favorite chili
1 can of Ro-tel Tomatoes (drained)
Velvetta Cheese
Corn Tortillas
1 small chopped Onion
Vegetable Oil

First start by browning the ground beef and seasoning with taco seasoning per the directions on the package.  Drain off any excess oil or water.  Combine seasoned ground beef with the can of Wolf Brand Chili and Ro-tel tomatoes.  This is your filling.

Cut slices of velvetta approximately 1/2" thick.  Then cut each slice into thirds or fourths, making cheese sticks.  You will need approximately 4-5 slices.

If your corn tortillas are soft and pliable you can skip this step.  If they are not simply heat about 1/2 teaspoon of vegetable oil on medium heat in a small skillet.  Heat tortilla and oil for approximately 15-30 seconds on each side. 

Remove the tortilla from the skillet and place in the bottom of a casserole dish, preferrably with high walls or a 9x9 baking dish will also work.  Continue until you have the bottom layer of the dish covered with soft corn tortillas (approximately 4).  Now use 1/3 of the chili filling, spread it evenly on the tortillas.  Throw in a handful of onions, if you like them.  Next space 4-5 cheese sticks evenly on the filling.  Now repeat with the soft tortillas, chili filling, onions and cheese 2 more times. 

Cover with foil and bake at 350 for approximately 20-30 minutes or until the tortillas are soft like enchilladas.  Remove from the oven and let sit for approximately 10 minutes before serving.

You can also freeze this receipe to be eatten at a later date...You know those nights that you don't feel like cooking...I know I do!  If you freeze it I usually put it directly in the oven from the freezer and cook for 45-60 minutes, but check on it regularly.  When the casserole is bubbly you know its ready!

Wednesday, October 27, 2010

Rotisserie-Style Crockpot Chicken

I've been really, really busy recently with my other business Girly Girlz Bows so I haven't had a lot of time to go grocery shopping.  Oops!  Never fear I had a whole chicken in the freezer, a crockpot and I'm good to go!

I've mentioned A Year of Slowclooking before but I {HEART} this website!  I've gotten so many good receipes from her suggestions and they are EASY, EASY, EASY and DELICOUS!

Today I'm using her Rotisserie-Style Crockpot Chicken that I would like to share...

Take one whole, thawed (if you froze it) chicken.  I remove all of the insides that I'd rather not describe...you know what I'm talking about, right?  I also take a small knife and cut underneath the skin to remove all of the skin.  Yuck!  I didn't want to touch anything for hours after pawing that chicken but it makes for a healthier chicken and not so much grease in the crockpot.

Next rinse the bird good; inside and out.  Pat dry with a paper towel.  Now let's season up this bird!

Let's start with one side and we will do the same the other after this side is fully seasoned.  I liberally apply salt and pepper to the breast side of the chicken.  Next I cover the bird with a light coating of Seasoned Salt and Onion Powder.  Turn the bird over so the breast side is down and reapply the seasoning.  Finally I stuff the inside of the bird with about 1/2 an onion and throw in about 3 tablespoons of minced garlic right on top of the bird.  All done!  :)

Cover and cook on low for 8 hours or on high for 4-5 hours.  Enjoy!

Tuesday, October 19, 2010

{Giveway} Misty's Blessings

Go check out Misty's Blessings she has the cutest homemade infant shoes, nursing covers, super hero capes and crowns, personalized paci clips, and the list goes on...


Right now she is giving away a gift certificate to one lucky winner so go enter now.  Contest closes October 22nd.  Good luck!

Thursday, October 7, 2010

Facebook: Link to Someone in your Status Update

I know many of you know how to do this and I actually came about it accidently but I am addicted!  Did you know you can link to someone or something in your status update in Facebook?  Ever wondered how people get those blue underlined names in the update? 

IT'S EASY!

Simply type your update and when you are ready to link to someone type an @ sign and immediately start typing their name.  No spaces!

Ex.  @GirlyGirlzBows  will link to Girly Girlz Bows  @Sara Blair will link to Sara Blair.

Go try it now and see how fun it can be to link to some in your next post.  Actually, "Like" Best Thing Since Slice Bread and then give me a shout out in your post and see how it works!  ;)


Wednesday, October 6, 2010

InchBug Bumpy Name Orbit Labels

Are you looking for some way to label your child's bottle or sippy cup?  InchBug has the perfect solution!  It was just over 2 years ago that I purchased a custom set for my daughter Grace.  While she didn't go to day care, she did take her sippy cup with her to church so having it labeled was muy important for me (the germ-o-phob mom). 

These labels are made from a stretchy flexible plastic, similar to those colored bracelets like Lance Armstrong did with Live Strong.  Anyways, they slip on your cup or bottle and can easily be removed, but why would you need to?  They are dishwasher and microwaveable safe!


Monday, October 4, 2010

Personalized Picture Bean Bags


If you haven't checked out Infarranty Creative, you have GOT TO!  She is great!  When she posted about the "Issac Bags" that she made her son I knew this was something I was going to have to do for my daughter.  So for her birthday I made 2 bean bags for each child as a party favor!

The only thing that I would add to her tutorial is that when I tried to feed the fabric through my printer it wouldn't recongize it and then it started curling at the end so I attached it to a plain sheet of paper with a very small piece of scotch tape, leaving a very small piece of tape on the fabric so it wouldn't interfere with printing.  Also, the fabric was a bit dusty after drying and when some of the "dust" came off it looks like some of my picture lost a bit of it's color but I liked the "worn" look that it ended up with.


Saturday, October 2, 2010

Ice Cream Cupcakes


For my daughter's 3rd birthday I decided to make ice cream cupcakes.  Do you remember these from when you were little?  The thought of them brings me back to the days when all you had to worry about was what you were going to have for lunch!  Anyways, since she is getting to an age of independance, where she wants to do everything herself I thought these would be perfect for her party!


Things you will need:
Cake Mix
Ice Cream Cups (with a flat bottom)
Applesauce

After much research I decided to replace the 1/3 cup vegetable oil that was needed for the cake mix with just about 1/3 cup of apple sauce.  I used Mott's All Natural (no sugar added).  I mixed the cake mix according to the directions on the box, with the applesauce substitue.

I remember my mom making the ice cream cupcakes standing up in the over but when I went to Betty Crocker and SHE suggested that you invert the ice cream cone upside down. So I did a test and here is my scientific experiment for you to review!


Betty's Way

Next, I prepared 3 ice cream cone cupcakes Betty's way.  This called for placing cupcake liner in a muffin  baking pan.  I took an ice cream scoop and filled the liner about 2/3 of the way full.  Place the ice cream cone gently on top.  Don't push the cake batter up into the cone (like I did on 2 of them) because it will make a not-so-pretty cake mark on the rim of your cone.  Just gently place the cone on top.


Sara's Way


Place an ice cream cone in the muffin tin.  Using the ice cream scoop, fill the cone about 2/3 to 3/4 of the way full. 
 

 I baked these for about 18 minutes (iniitally set the timer for 15 minutes) and keep adding time until I could stick with a toothpick and it came out clean.


The RESULTS

Appearance
When grading these on appearance I will have to say my way produced a cleaner finished product.  In my cones I filled them about 2/3 of the way full, next time I will add a little more batter to each cone so that it will rise to the top of the cone.  Betty's way left the top of the ice cream cone with a harden brown crust (similar to what you would see on the bottom of a cup cake.  From some of the reviews on her site people commented that the cones were top heavy due to the way these were cooked but I didn't find that at all.  I found them to be about the same as my way.  However when I removed the cupcake liner from Betty's way some of the cake actually came off too, making it a difficult surface to apply the icing.


Betty's Way

 Sara's Way

Taste & Texture
With an unanimous vote, my way won again.  These cupcakes were far more moist and delicate, as opposed to Betty's way where the cupcakes were tougher at the top due to the harden crust-like finish.

The Verdict

It looks like I might have a one up on good ol' Betty Crocker!  But you know, my testers and I may just have been a little biased so you try your own experiement and let me know which way you prefer!


Thursday, September 30, 2010

Facebook: Like Box

Have you been to blogs or websites that have that cute little box from Facebook where you can "Like" them and see how many others like them too?  Well now you can have your own!


Simply follow these quick instructions:

  1. Go to http://developers.facebook.com/docs/reference/plugins/like-box
  2. Facebook Page URL (web address)....If you don't know it open FB and go to your page, then copy the address in the address bar or if you haven't already set up your FB username {see my quick tutorial here}.
  3. Width-Choose the width of your box (in pixels).  If you are adding it to the side bar in a blog you want about 200-250 pixels.
  4. Connections-Enter the # of people who like you that you would like to appear in your box.  The default is 10; which means that 10 profile pics of people who like your page will randomly appear in your box.  You can decrease this number to reduce the length of your box or increase the number to increase the length of your box.
  5. Show Stream- This feature allows you to show your most recent status update or profile stream or "What's on your mind" piece from your Facebook Page.
  6. Header- Allows you to have the option of adding the header "Find us on Facebook" to the top of your Like Box.
  7. Get Code- Click this box to get the code that you will copy and paste into your webpage or blog.  If you are entering this on your blog you will need to add and "HTML/JavaScript" gadget and paste the code in there with NO TITLE.
My settings for my Like Box:

Width-200
Connections-6
No Stream
No Header

Tuesday, September 28, 2010

Daily Deals on Groupon

So if you haven't heard about Groupon yet then where have you been?  All kidding aside, I HEART Groupon!  My best friend Lyndsay turned me on to it about 3 months ago and I have bought like 4 groupons since. 

Groupon is a deal-of-the-day website that is localized to major markets in the United States.  These deals are often 50% off or more the retail price for things that you typically buy anyways so buy in advance and save!


For instance here are some examples of Groupons I've taken advantage of:

  • $7 for $15 worth of food at Double Daves Pizzaworks (BTW the BEST Pizza Rolls EVER! And on Tuesday they are buy 1 get 1 free so you are really paying like 25% of the cost!
  • $30 for 5 Adventure bootcamp sessions--bought 2 worked my butt off for the month of July, loved it!
  • $12 for 2 admissions to Dewberry Farms.  Tickets are usually $12 each so it's like buy 1 get 1 free.
  • $7 for $15 worth of food at Texadelphia

You can sign up for daily emails of the deal of the day or you can like them on facebook and see the deal of the day in your daily feed.  Either way, check them out!

You can also refer friends to Groupon and if they purchase something within 24 hours of your referral you will get $10 towards your next Groupon purchase!  Not bad!

Saturday, September 25, 2010

Mabel's Labels are the BOMB!


Mabel's Labels www.mabel.ca


So I'm back in the saddle, or so to speak.  We took some time off for summer vacations and then school starting...my little one started pre-school!

So since I was starting my little one in pre-school I was on the hunt for something to label her sippy cup, extra pair of clothes, shoes and basically EVERYTHING I sent with her to school.  In my search I found the perfect match, MABEL'S LABELS!

I just got my Mabel's Labels in the mail and when I couldn't find my daughter's InchBug name band, which those are super cool too...I ran to my Mabel's Labels to put on her sippy cup for her snack.

I got the Classic Sticky Labels with the flower in pink and they are super cute.  I've put them to the test and so far so good.  I'll update this post in a couple of weeks and let you know how well they hold up for me but I know I have several friends who absolutely sware by them; so I'm sure they will be the bomb!

Mabel’s Labels – Perfect for school, camp or daycare.


This post was based on my personal opinion and admiration for Mabel’s Labels. I adore them so much that I’m a Mabel’s Labels Buzzmama and an Affiliate!

Thursday, September 23, 2010

Facebook: Easy to Remember Facebook Address

I don't know about you but I hate that when I copy and paste the URL (web address for my non-techie peeps)  to my Facebook Page it is this long and obnoxious...I mean look at it:

http://www.facebook.com/?ref=logo#!/pages/Best-Thing-Since-Slice-Bread/108888559137410?ref=ts

Facebook now allows you to have a "username".  What does this mean for you?  If your page meets certain criteria (which I can't really get the straight answer on this because it says you have to have 1000 fans but clearly I don't and I registered usernames on almost all of my pages [not the ones I have recently created]).  You may have noticed on commericals that certain pages have URLs like www.facebook.com/pizzahut or www.facebook.com/subway well these Fan Pages are using usernames to make the address to their facebook page much easier to remember than that long line of random letters, characters, and numbers as listed above.

To register your username:

1.  Log into your Facebook profile
2.  Go to www.facebook.com/usernames
3.  Choose the page name for which you want to register a username from the drop down menu.
4.  Type the username you wish to use in the box
5.  Click on "Check Availability"


There are certains rules that go along with Facebook Usernames:

1.  Once you register this username you may not change it.
2.  You may not sell or transfer usernames
3.  And some other legal speak that I can't remember but you will see it in the pop up box before your username is assigned to your fan page.

So go out and register your username today before someone else does!!! 


P.S. Here is a link to more details on Facebook usernames!  http://www.facebook.com/note.php?note_id=110318206339

Friday, July 9, 2010

Chocolate Pudding Pie

I remember when I was younger my Mom would make this delicious chocolate pudding and cream cheese pie.  It was very simple but I can't remember the receipe!  Ahhh!  So I found this receipe posted on a discussion group and made it for our 4th of July dessert and it was fabulous so I wanted to share with you!

Original Receipe:

Crust
11 x13" pyrex dish

2 sticks of butter
2 cups of flour
1/2 cup of pecans

Mix till crumbly. Bake at 350 for 15 min. Let cool.

Cheese Filling
1 8 oz. package of cream cheese-soft
1 cup powder sugar
1 cup of cool whip

Mix and spread on crust.

Pudding Filling
3 small (3.9 oz.) packages of instant choclate pudding
3 cups of milk
1 cup of cool whip

Mix pudding, Fold in cool whip. Spread over cream cheese mixture.

Top with cool whip.

Suggested to buy 1 lrg. and 1 sml. cool whip containers to make this dessert.

My redenition:

I modified it slightly because I wanted something quick and easy so I bought a prepared shortbread pie crust in the baking aisle.  This brought on another issue that this receipe made too much filling for a pie pan so I had to cut it down.

I used 1 8 oz. package of Neufchatel Cheese (1/3 less fat) put probably could have gotten away with using 4-6 oz. and cutting back the powdered sugar accordingly.  In addition, I used only 1 small package of instant chocolate pudding (not because I wanted to but because I accidently grabbed 1 package of cook & serve and 1 package of instant) mixed with 1 cup of milk. 

Needless to say it was a hit with my family and it took me all of about 15 minutes!  Enjoy!


Friday, June 11, 2010

Bandana Dress

This just might be the easiest dress I have ever made...Well, maybe that is because it is the only dress I have ever made, but still!  Thanks to Trey and Lucy for the super easy tutorial.  It may have taken me slightly longer than 15 minutes to crank out the first one but after that I was flyin'...

Here is one I made for a friend for a baby shower!


For the embroidery part I did go through 3 bandanas until I got the monogram to stitch correctly.  I wasn't using enough stabilizer so here is what FINALLY worked for me.  I used one layer of Sulky Totally Stable Iron-On Tear Away Stabilizer (same stuff I use on t-shirts) and then I hooped a heavyweight tear-away like Sulky Stiffy Stabilizer and used an adhesive spray Sulky Temporary Spray Adhesive to attach the bandana to the hooped stabilizer.  By the way I also purchased my font from AKDesigns Boutique...it's the #12 Bold font!

By the way, be warned that the 100% cotton bandanas will shrink up about 1-1.5" on each side after you wash them (and they get a lot softer than they are in the stores).  I think this dress cost be a total of like $2.15, can't beat it!

Sunday, June 6, 2010

Ham and Cheese in Puff Pastry

I am a little obsessed with the Food Network!  I just don't have the time to watch it as much as I wish but I did have time to catch Ina Garten and love to share this recipe with you.  I'm not a huge fan of ham but the Ham and Cheese in Puff Pastry just sounded too good (and it is).  Did I mention it is E-A-S-Y?

Since it is just my husband and I who would eat this (my daughter doesn't like mustard) I changed up the receipe a bit so here is what Idid...

Instead of using 2 pieces of puff pastry I used just 1 piece and folded it in half to make the pastry.  Also, I had some leftover frozen ham from Easter in the freezer so I diced it up in bite sized pieces and used it instead of the sliced deli ham.  This gave me 3 servings, which is just perfect for us because I don't like left-overs.

Wednesday, June 2, 2010

Finger Stamp Cards

I {HEART} Infarranty Creative's blog, you should too!  For Teacher Appreciation Day Beckie and her son Issac made hand stamped cards for his teacher.  Well my daughter is only 2  1/2 so she didn't have a weekday teacher but I thought it would be cool or give to her sunday school teacher at church.  I dusted off the scrapbooking supplies (haven't touched them since my second daughter was born in December) and we went to town.  I got the idea form Beckie and she got the idea from Fun Family, well you know how it goes in Blogland, 7 degrees of separation for everything, anyways check out Beckie's tutorial here...


Tuesday, June 1, 2010

No More Black Guacamole...

How much do you hate it when you make a killer guacamole dip but you can't keep it because no one likes black guacamole the next day???  Well there is a way to save it!

Avocados turn brown or black due to oxygen hitting the surface, so save your guacamole by taking a small piece of cling film like Saran Wrap and press it completely to the top of your guacamole, making sure to seal the edges well.

Guacamole that has been stored in the refrigerator for 3 days...


Stir it up and you are good to go!


Eggs Rolls and Goyza (Potstickers)

Using the crock pot roasted chicken breasts simply chop the chicken so that it is in mini bite sized pieces.  When you cut it some of the chicken will actually shread, it's ok!  I used about 1 breast for 7 eggrolls and 21 goyza!


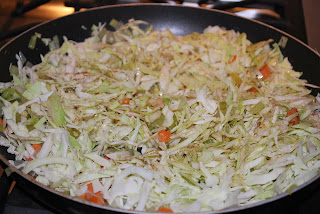
Next, in a skillet add about 1-1 1/2 cups of shredded cabbage and 3/4-1 cup of the Trinity.  You may think it is too much cabbage but it will cook way down, so don't you worry your pretty little head!


Let the mixture cook down for about 10-15 minutes, stirring occassionaly.  The cabbage will become opaque and soft.  Add the chicken and I also added about 7 chopped shrimp.


Using egg roll wrappers located in the produce section of your grocery store, now you are ready to roll your egg rolls...


  1. Place about 2 tablespoons of your filling mixture in the center of the wrapper.

2.  Fold the sides in and wrap up the bottom edge it tight around the mixture, rolling it all the way up.  Before you get to the end apply a dab of water to the corner of the wrapper so that it will stick and stay closed once you finish rolling it.


To cook:  Heat a pot aobut 1/3-1/2 full of oil.  Fry the egg rolls until they turn golden brown.  If you are going to freeze the eggrolls cook to a light golden brown color because when you reheat them in the oven they will cook more and you don't want them overcooked.

Using the goyza or potsticker circular wrappers, also found in the produce department at your grocery store fill with about 1 teaspoon of filling.  Dab your finger in water and rub around the circumference of the circle. 


Fold in half and press the edges together. 

To cook:


I quickly made 7 egg rolls and 21 goyza (potstickers).  Perfect as a meal by themselves or appetizer.

Thursday, May 27, 2010

Crockpot Chicken

Have you ever watched Robin Miller on the Food Network?  Well she takes a set number of ingrediants and cooks them one night to use them for a couple other meals throughout the week.  So I used Robin Miller's style cooking today!

A Year of Slow Cooking is a great blog if you have not checked it out.  In 2008 she made something in her crock pot every day so she had 365 receipes in 2008 alone!  So maybe she has slowed down and is now only posting one every couple of days but if you have ever wondered by you registered for the crock pot on your wedding registry well she will have something you will love to make!  Today I am using her shredded chicken receipe as a guide.

First I started by taking a package of bone-in chicken breasts.  I removed the skins because my husband hates chicken fat, well I do to when I come to think of it...Anyways, liberally apply salt and pepper.  Throw them bone side down into a crock pot.  Turn on low for 5-6 hours.  I didn't add any liquid this time but next time I may add about 1/2-1 cup of water as my breasts didn't make as much liquid (broth) as I would have liked.


With these 3 chicken breasts I will make Chicken Spaghetti, Chicken Salad Sandwiches, Chicken & Shrimp Eggrolls and Goyza (Potstickers)!

Wednesday, May 26, 2010

Personalizing a Onesie

I have a 6 month old so personalizing onesies are a favorite thing to make her clothes special!  A friend of mine asked me to personalize some onesies for her twins' first birthday and I was thrilled.  Because knits are a stretchy fabric I was extremely nervous on how I should proceed.  Here are the steps that finally worked for me...

1.  Turn the onesie inside out and iron on 2-3 layers of an iron-on, tear-away stabilizer like Sulky Totally Stable Iron-On Tear Away Stabilizer.


2.  Hoop a single sheet of light weight tearaway stabilizer.


3.  Place you grid on the design so you know where it will sit on top of your hoop.  Spray the tearaway stablizier with a spray adhesive like Sulky Temporary Spray Adhesive and press the design that is facing up in the picture down on the adhesive and hoop.


4.  Insert your hoop and begin stitching.  Roll up the edges of the onesie so that they don't get caught in the way of the needle during the stitching.


5.  Lastly take a piece of Pellon Interfacing Lightweight Fusible and iron it on top of the design.  This prevents the design from scratching or irritating the baby's skin.


Look how cute they turned out!