Thursday, April 29, 2010

Market Totes

I am sooo excited!  I just got my order from Wholesale Boutique (formally Silver Wholesale of Myrle Beach) which included a new style of market totes for me to embroider.  I ordered the pink damask flower for myself and of course it was the first one I did! 


Step One: Create your design with an embroidery software.  I have been using Stitch Era Universal because it was free (with a $20 tutorial at My Embroidery Mentor).  I would like to try out the SewWhat Pro in the near future too.  When I create the design I add a quick basting stitch first in order to securely tack down the ackward tote to the hoop in order to prevent it from moving while stitching the design since you can not hoop a market tote.  You can purchse basting stitches or I downloaded it free from Sew Forum.  ALWAY test stitches you download for free before you use them on an embroidery blank as you never know the quality!

Step Two:  Hoop your stabilizer. I used a light weight tear-away stablizer.  Insert your hoop on your machine.

Step Three:  Remove the frame from the tote and turn it inside out.  The feet on the bottom should now be the bottom of the tote if you are looking down into it. Make sure the velcro strapes are velcroed into place so that they don't accidently get caught in your design.

Looking into the tote.

Step Four: Insert the market tote on it's side with the top of your machine almost touching the bottom feet of the tote.  I use the grid and place it on top of the tote to see the boundaries, line it up straight.  The totes from Wholesale Boutique are nice because they have 3 velcro straps so I just lined up the center of the hoop grid with the middle strap.  Also make sure the velcro straps are out of the path of your design so that you don't sew them together.  You can not do a perimeter path on these because the whole tote will move due to the size and bulkiness of the tote.


Step Five:  Hold the tote down with your hand, after you lined it up and start your basting stitch.  I keep my hand on the tote at all times while sewing the basting stitch to ensure that it doesn't bunch or move as it is stitching.  Once the basting stitch is down you are good to go!  AK Designs Boutique sells basting stiches for all types of machines.


Step Six: Stitch the remaining design.


Step Seven: Remove the hoop from the machine.  Leave the tote stitched to the hoop (makes it easier to remove the basting stitch).  Using a seem ripper, rip the basting stitch about every 4th stitch.  Tear away the stabilizer and hoop.


Step Eight:  Turn the tote right side out and you are finished!


Market totes are so hip right now!  I use mine almost every day just throwing things in there that I need to do that day, like library books, coupons, packages to mail, etc.  I recently gave one to a friend for her daughter's birthday and she loved it!  And so did her sister, who said she wanted one too!

I have to thank Anne from Anne Michelle Designs who graciously walked me step by step through this when I purchased some market totes from her.  THANK YOU!

If you don't have an embroidery machine and would like a personalized market tote visit my website at http://www.sewyours.blogger.com/ to purchase one today!

Thursday, April 22, 2010

Monogrammed Towels

This is my first embroidery tutorial post and I'm both excited and nervous! [eek!]  Once I got my embroidery machine last fall the very first thing I did was monogram some towels for Christmas presents.  Everytime I sit down with a new embroidery blank (t-shirt, diaper cover, market tote, etc.) I get nervous because I just don't want to mess anything up!  I usually go to AK Designs Boutique's Yahoo Group and ask for some help...they are always willing to help!  Once I get enough confidence I go and try it myself. So here are some pointers that may help you when you get ready to embroider on a towel.  I have the Brother PE-750D machine and I absolutely LOVE it!

Things you will need: towel, embroidery thread, a light or medium weight tearaway stabilizer, spray adhesive (I use Sulky Temporary Spray Adhesive- 3-3/5 oz.), water soluable solvy topper (I use the one I purchased at the dealer where I purchased my machine), and disappearing ink marker.


First hoop the stabilizer, making sure there is no wrinkles or extra slack once it is hooped. 
 (I will post on hooping 101 soon).


Next, find the middle of your towel by folding it exactly in half lengthwise and marking with the disappearing ink marker.  Lay the towel over the hooped stabilizer, lining up your center mark as best as you can for a starting point.  I used my marker to show you the center.


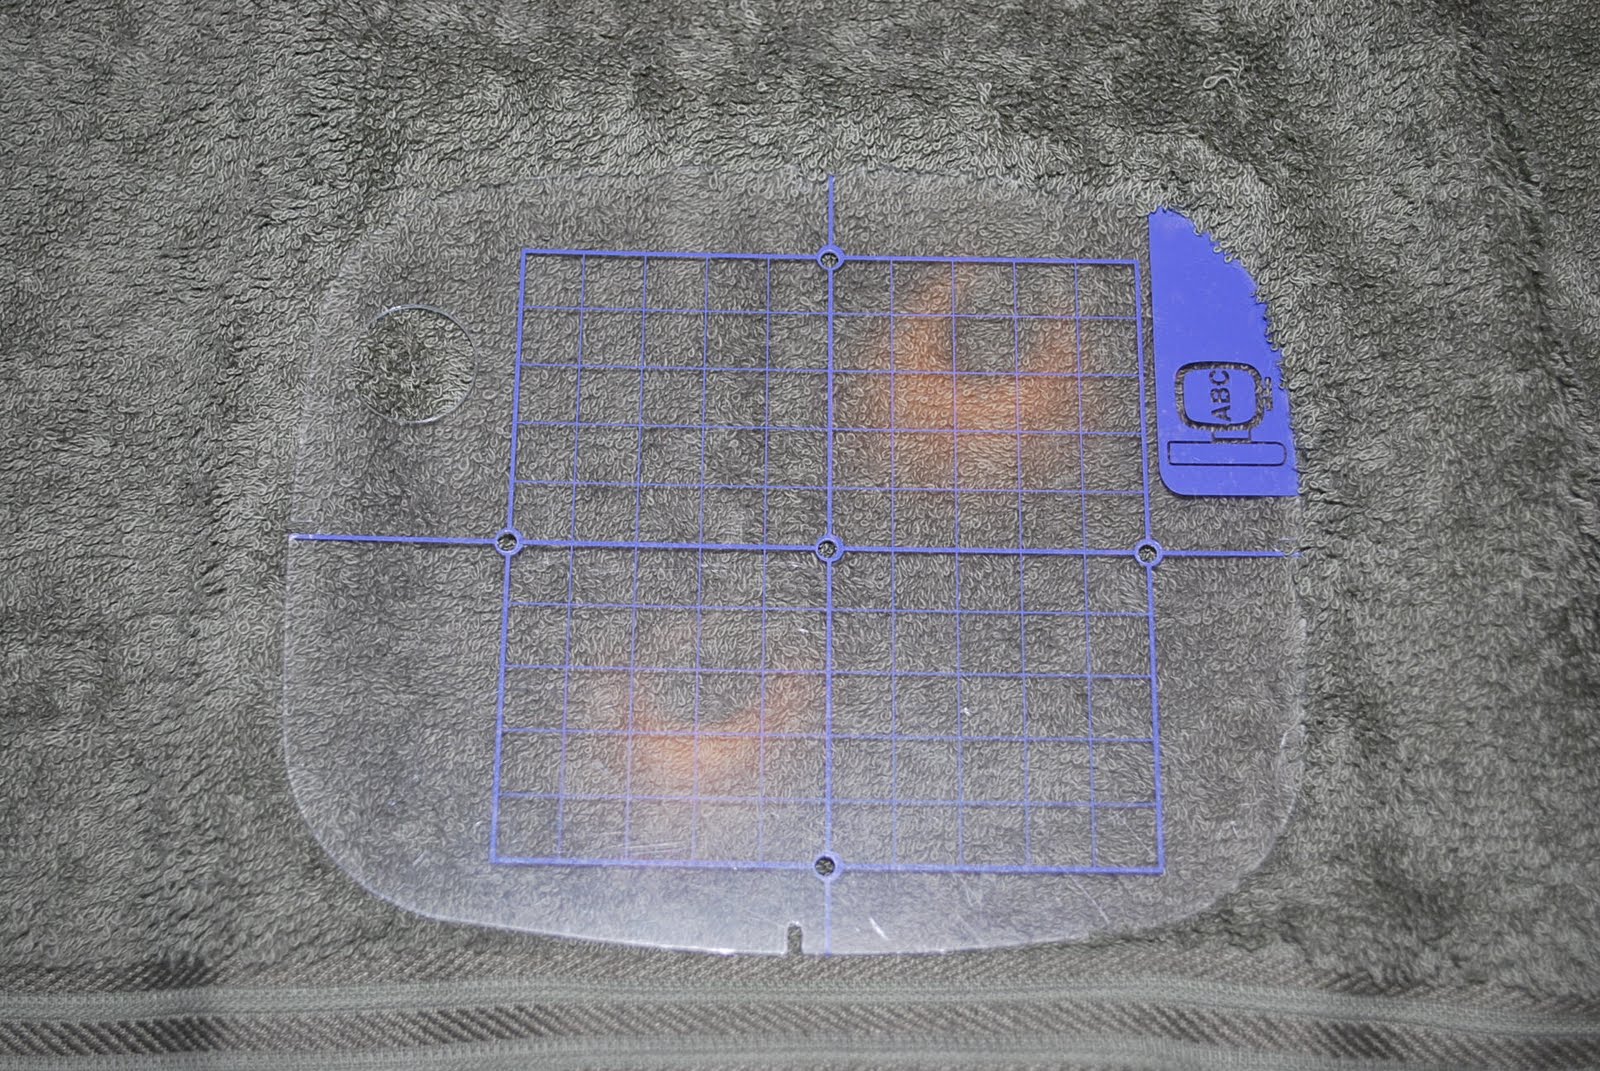
Lay your clear ruler grid on top of  your towel, lining up the middle mark on the towel with the middle line of the grid.  Once your middle mark is in place then make sure the edge of the towel is straight and this is your final placement of the towel.

Fold the towel over in half and spray the stabilizer with the spray adhesive.  Return the towel to the flat position and press firmly on the towel where you applied the adhesive.  Next, fold the towel over the other way and spray the other side with spray adhesive and again press firmly.


It is difficult to see in this picture but you can basically see the outline of the hoop beneath the towel because it is pressed onto the stablizer.


When a blank has a pile (little loops in the pattern of the towel), specifically like towels do you need a "topper" to hold down the pile so that your design will stitch evenly and not get caught in the pile.  Cut an area of water soluable solvy and place on top.  Some people will pin this down I simply hold it down with my fingers until there are enough stitches done so that it will not move. 
WARNING: do not get your fingers caught in the path of the needle!


Insert the hoop into your machine.  Trace the perimeter of your design so you have an idea of where to place the solvy.


Begin stitching the design.


Once the design is finished stitching, remove the hoop from your machine.  Pull the backside of towel from the stabilizer.  This is the beauty of tearaway stabilizer, you literally tear it away!


Next tear away the solvy topper.  Any remaining topper may be removed by applying a small about of water to the pieces.  Most of it should come off simply by pulling it off.  Here is your finished monogrammed towel.  An easy, inexpensive gift that is alway appreciated!


Have any questions or suggestions?  Please leave a comment!


Tuesday, April 20, 2010

Great Places for Embroidery Fonts and Designs

I spend hours searching the internet for all kinds of things!  When I got into embroidery I was looking for the least expensive designs and fonts.  I'd love to share some of my favorites with you!  I will update this frequently when I have new finds.

FONTS
  1.  8 Claws and a Paw - they have fonts from $2.95 that includes multiple sizes (usually 1 in, 2 in, 3 in and 4 in).  They also offer a month subscription to download any fonts they offer on their site.  What a deal!  They update their fonts regularly.
  2. Jolson's Designs - fonts are only $3 and include multiple sizes (usually 1 in, 2 in, 3 in and 4 in). They give you the heads up if letters in their 4" set may need a 5" x 7" hoop, which is helpful.
  3. AK Designs Boutique - very cute & trendy fonts, and her designs are exceptional.  Like her page on Faecebook and get alerts for sales!  They also have a yahoo group that is extremely helpful and Angie, owner, is an active participant and she offers free monthly designs here as well.

APPLIQUE DESIGNS
  1. Planet Applique - this site has the cutest applique designs and they start at just $.99!  Wow!  They also have a Yahoo Group that is very helpful and they offer monthly freebie designs there too.

FREEBIES
  1. Embroider This! - over 200 free embroidery designs and affordable embroidery blanks.  They have a sister site Wholesale Linens that offers the same embroidery blanks but at wholesale prices but you have to have a tax ID# and must complete the wholesale application.